Managing Customer Groups
This manual explains how to manage customer groups in the admin area of your website.
Watch the video for a brief overview.
The manual below explains everything step by step.
1) Accessing Customer Groups
1.1. Log in to the admin area of your website.
1.2. Navigate to Orders/Customers → Customer groups.
2) Creating and Managing Customer Groups
2.1. To create a new customer group, click on the Insert customer group button.
2.2. To manage an existing customer group, click on the group in the list.
2.3. You can then use the following options:
- Edit – modify group settings
- Edit Customers – manage customers assigned to this group
- Delete – remove this customer group
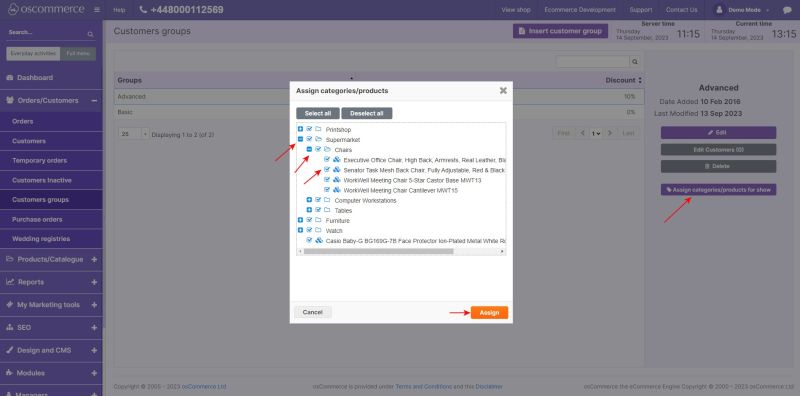
3) Assigning Products and Categories to Customer Groups
3.1. You can assign categories and products that will be visible only to this group.
- Select the group in the list.
- Click on the Assign categories/products for show.
- In the popup, check the boxes to select categories and products.
- Click Assign.
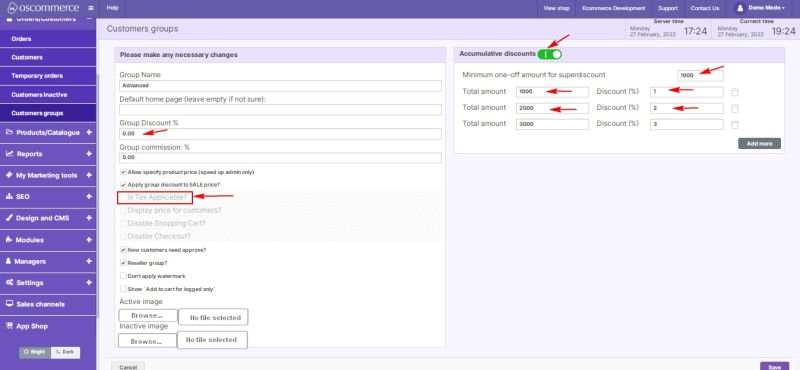
4) Editing Customer Group Settings
4.1. Click Edit next to the required customer group.
4.2. Available settings include:
- Is Tax Applicable? – enable to apply tax (VAT) to this group
- Accumulative discounts – enable to set discounts based on the total amount spent
Example of accumulative discount setup:
- Minimum amount spent: 1000 → discount 1%
- Minimum amount spent: 2000 → discount 2% …and so on.
5) Setting Default Customer Groups
5.1. To make a group the default for new or guest users:
- Navigate to Settings → Configuration → Customer Details.
- Click on the required option and then click Edit.
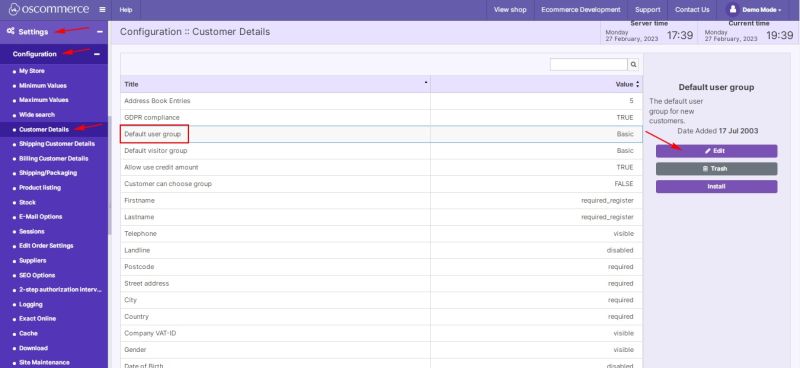
- Select the required customer group from the drop-down list.
5.2. This group will now apply either to:
- Non-logged (guest) users, or
- Newly registered customers, depending on your selection.