Managing Recovery Cart
The Recovery Cart functionality allows you to re-engage customers who added products to their shopping cart but did not complete the purchase. The system can automatically send reminder emails containing product images and optional discount coupons to encourage customers to return and finalize their orders.
This manual explains how to install, configure, and manage the Recovery Cart module in the admin area.
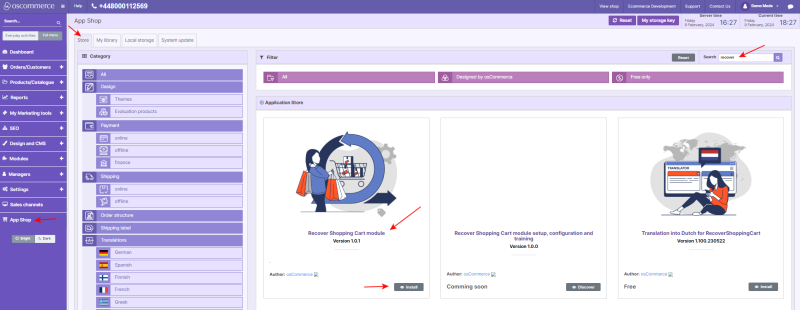
1) Install the Recover Shopping Cart Module
1. Log in to the admin area of your website.
2. Navigate to the App Shop and Store tabs.
3. Use Quick search to find the Recover Shopping Cart module.
4. Install the module on your website.
Also, see
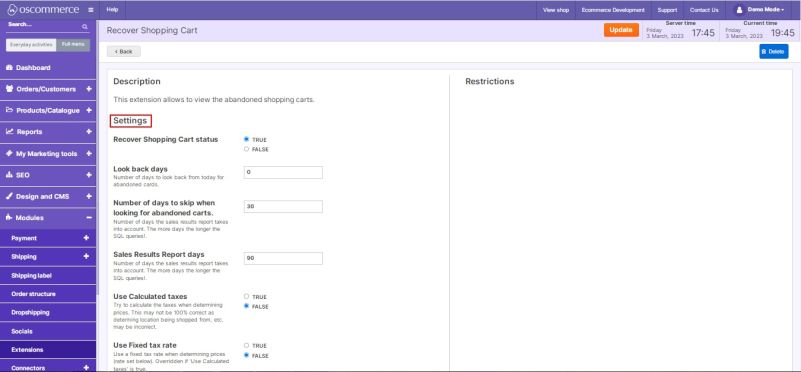
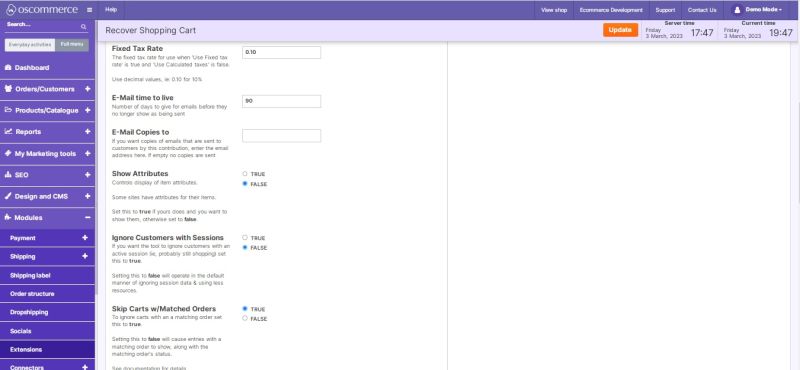
2) Access Module Settings
1. Go to the Modules and Extensions tabs.
2. Locate Recover Shopping Cart in the Extension Modules list.
3. Click Edit to access the module configuration.
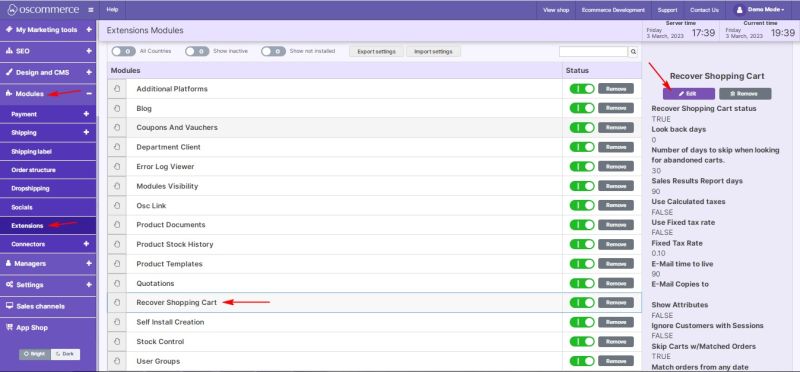
4. Each setting includes a short description for easier configuration.
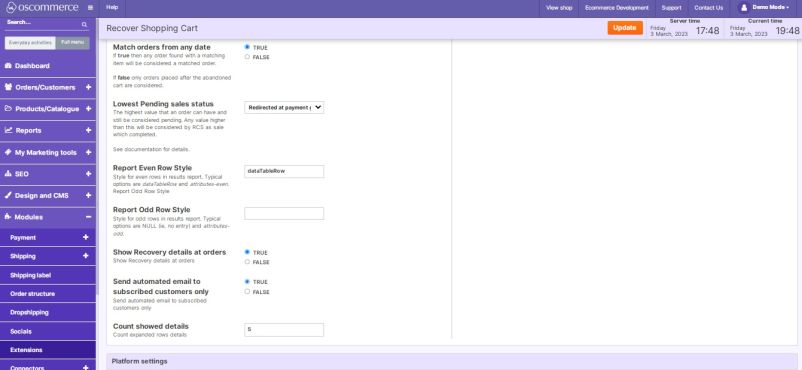
3) Configure Platform Settings
1. In the Platform settings section, select the required sales channel by clicking its tab.
2. Configure email delivery intervals for up to three recovery emails using the drop-down lists.
3. Select coupons for each email from the available drop-down lists.
- To send emails without coupons, leave the Select coupon option unchanged.
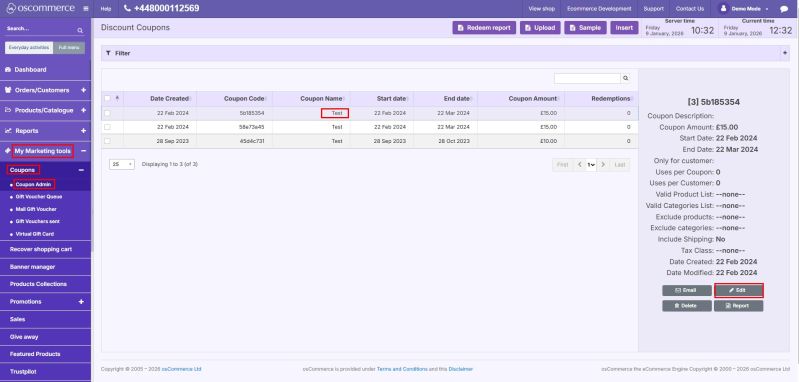
4) Make Coupons Available for Recovery Emails
1. Navigate to Marketing tools → Coupons → Coupon Admin.
2. Select the required coupon and click Edit.
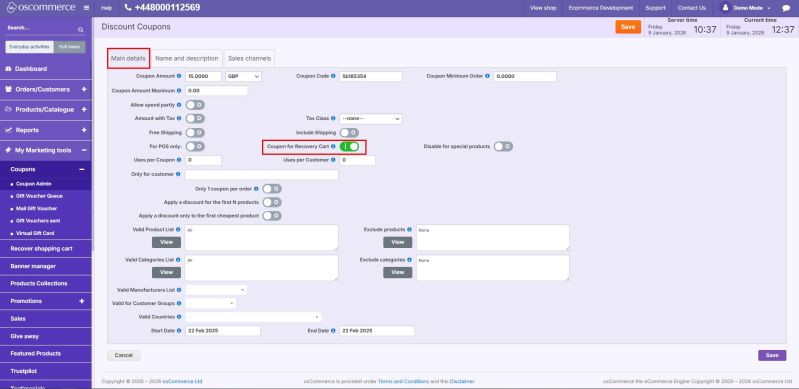
3. Under the Main details tab, enable Coupon for Recovery Cart.
4. Save your changes.
5. The coupon will now appear in the Recovery Cart coupon selection lists.
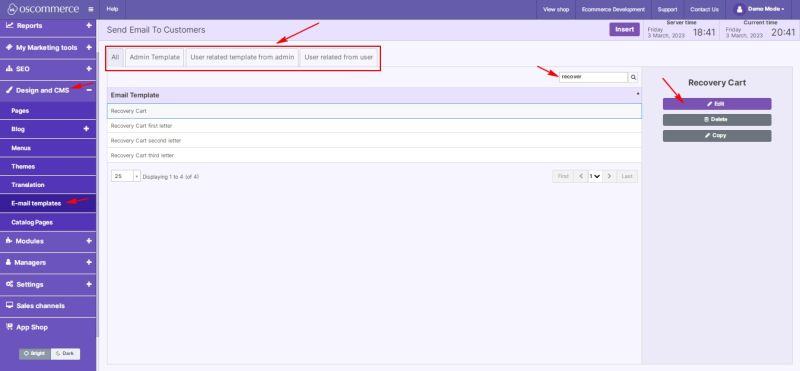
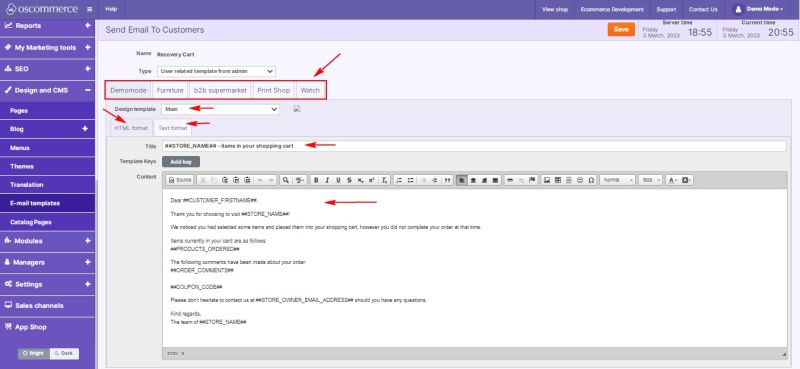
5) Edit Recovery Cart Email Templates
1. Go to Design and CMS → E-mail templates.
2. Under the required template group, select the appropriate email template.
3. Click Edit.
4. Use Quick Search to locate the needed template if required.
5. Select the desired front end by clicking its tab.
6. Choose the required design template from the drop-down list.
7. Select the email format using the available tabs.
8. Edit the necessary content fields and save your changes.
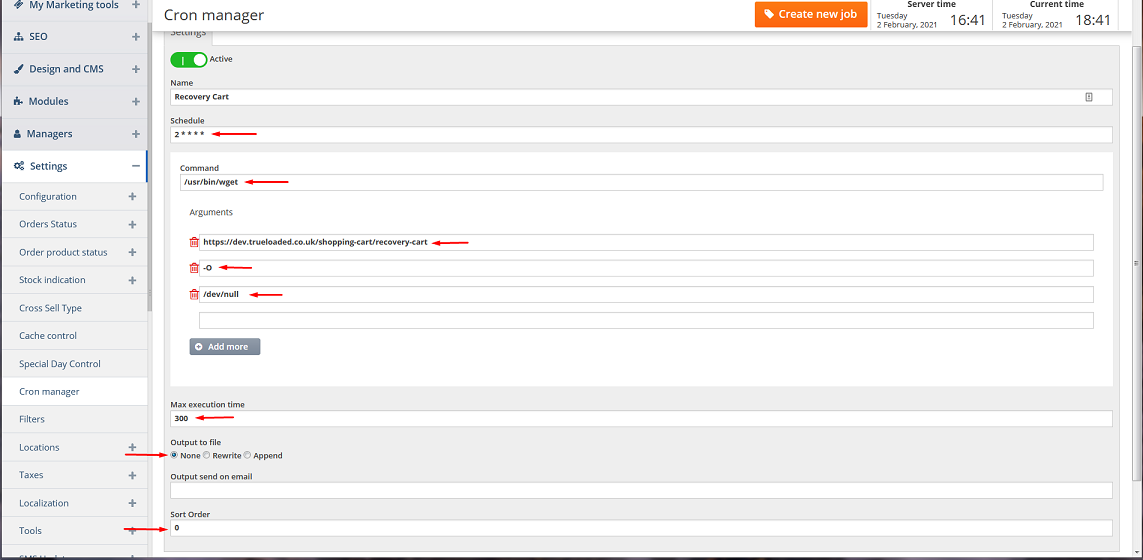
6) Configure Cron Scheduler for Recovery Cart
1. Download and install the Cron Scheduler module from the App Shop.
2. Navigate to Settings → Cron manager.
3. Select Recovery Cart and click Edit, or click Create new job.
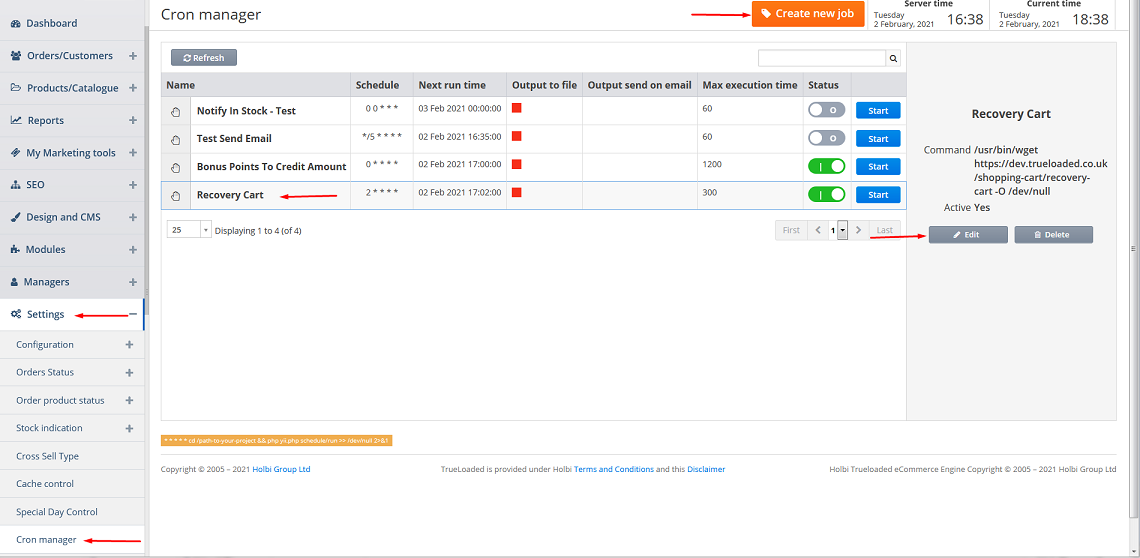
4. Fill in all required fields with appropriate values.
5. Save the cron job configuration.
Note:
Ensure the following command is installed and configured on your server:
2****/usr/bin/wget https://.../shopping-cart/recovery-cart -O /dev/null
7) Manage Recovery Carts
1. Navigate to Marketing tools → Recover Shopping Cart.
2. Review the list of customer shopping carts.
3. Use the available buttons to:
- Mark as contacted
- Mark as worked out
4. Additional actions available:
- View Legend
- Create new order
- Convert to order
- Send coupon
- Send Additional PS Message
- Add Notes to a shopping cart
Once configured, the Recovery Cart module helps recover abandoned carts by automatically contacting customers, offering incentives, and providing administrators with tools to track and manage recovery progress efficiently.