Managing Stock
Note: This manual is for osCommerce v4.
This manual explains how to manage product stock levels in your store.
Follow the steps below to view, track, and update stock.
1) Access the Product Stock Settings
- Log in to the admin area of your website.
- Go to Products/Catalogue → Products (Brands/Categories).
- Open an existing product or create a new one.
- Click on the Main Details tab.
- Go to the Stock section to view real-time stock values.
2) Understand Stock Status Fields
| Field | Meaning |
|---|---|
| Warehouse | Total physical stock currently stored. Updated after shipment. |
| Available stock | Stock available for buyers right now. Adjusts in real time. |
| In cart | Items currently placed in customers’ carts. |
| Not paid order | Items reserved in orders that are created but not yet paid. |
| Allocated | Items in paid orders waiting for shipment. |
| Deficit | Quantity ordered above available stock (allowed only if permitted). |
3) How Stock Levels Change During the Order Process
- Customer adds products to cart → In cart increases, Available stock decreases.
- Order is placed → quantities move from In cart → Not paid order.
- Order is paid → quantities move from Not paid order → Allocated.
- Order is shipped → quantities move from Allocated → Warehouse (physical stock decreases).
Important: The Available stock value reflects real-time availability and does not change when orders are paid or shipped.

All the fields mentioned above are clickable. Click on them to get more information about the actions connected to these fields. For example, if you click on the Allocated link, you can find the following information in the columns.
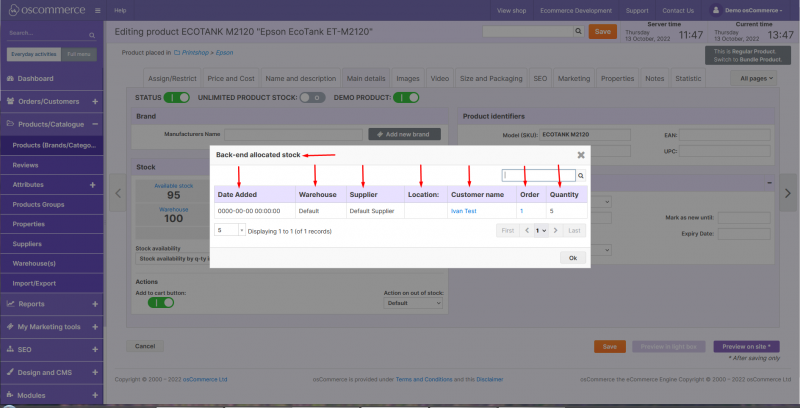
4) View Stock and History Records
- Click on any stock status value (e.g., Allocated) to see related order details.
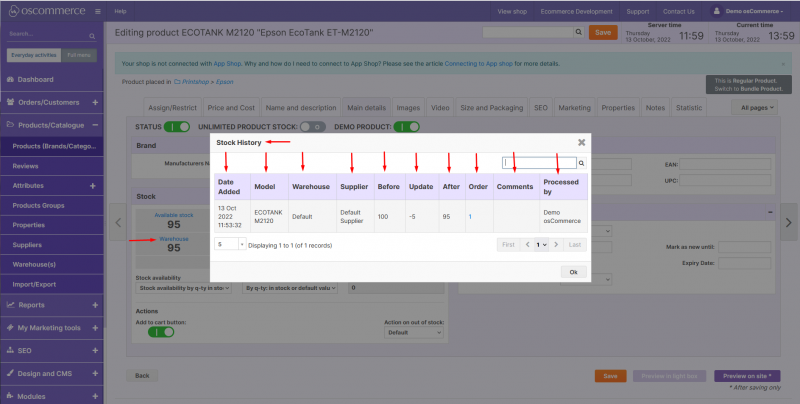
- Click Stock History to review stock changes and shipment records.
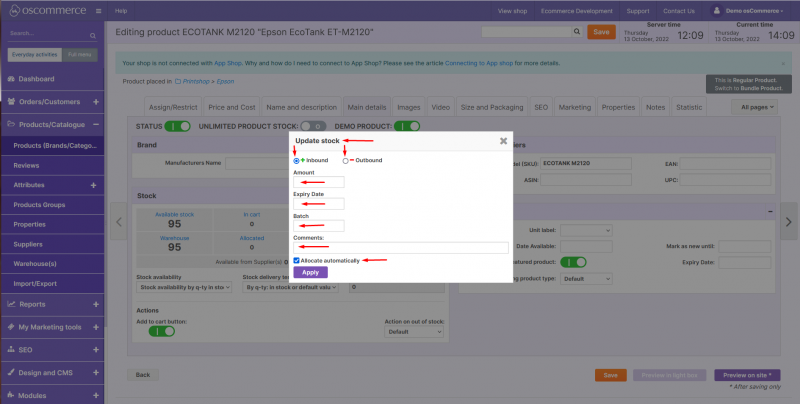
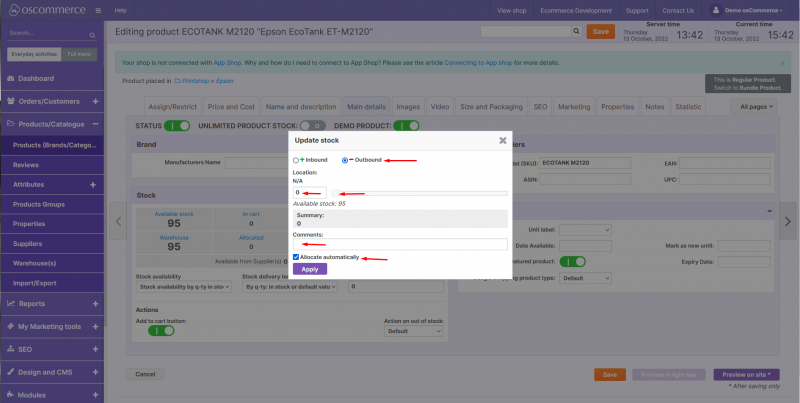
5) Update Stock Manually
- Click the Update stock button.
- Select one of the two options:
- + Inbound → to add stock.
- – Outbound → to remove stock.
When adding stock (+ Inbound):
- Enter quantity, expiry date (optional), batch (optional), and comments.
- To automatically fulfill previously deficit orders, check Allocate automatically.
When removing stock (– Outbound):
- Enter the quantity to deduct and optional comments.
- To update deficit orders automatically, check Allocate automatically.
If a product was out of stock at some point when an order was placed, the product in this order is in the deficit status. By checking allocate automatically option, you can make the system automatically update such orders, so the product status will be changed from the deficit to received.
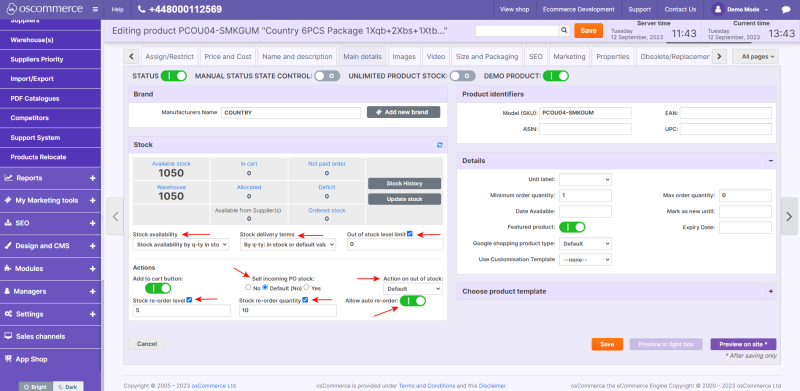
6) Configure Stock Availability and Automation
Using the controls in the Stock section, you can:
- Set stock availability status (e.g., in stock, out of stock, pre-order).
- Set delivery terms.
- Choose what happens when the product is out of stock (e.g., Notify back in stock, Contact form).
- Define out of stock level limit, reorder level, and reorder quantity.
- Enable Auto reorder and Sell incoming PO stock, if needed.