Managing Warehouse(s)
Jump to navigation
Jump to search
This manual explains how to manage warehouses and warehouse location blocks in the admin area.
For a quick overview of this functionality, watch the video first.
The manual below explains everything step by step.
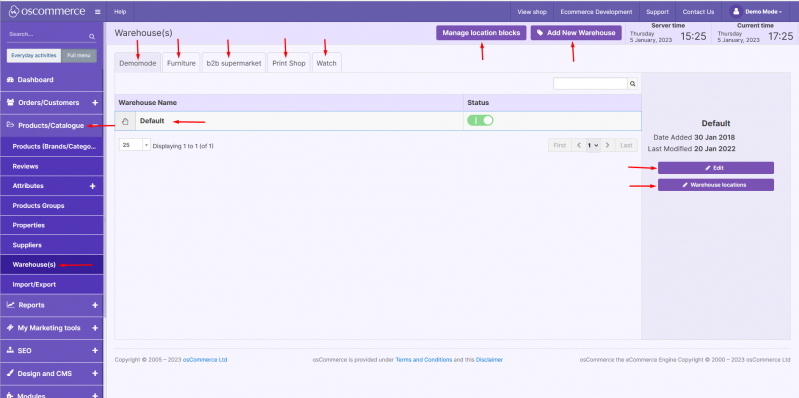
1) Accessing Warehouse Management
- Go to the admin area of your website.
- Click Products/Catalogue → Warehouse(s).
- Here you can:
- Filter warehouses by name or sales channel
- Add a new warehouse
- Manage location blocks
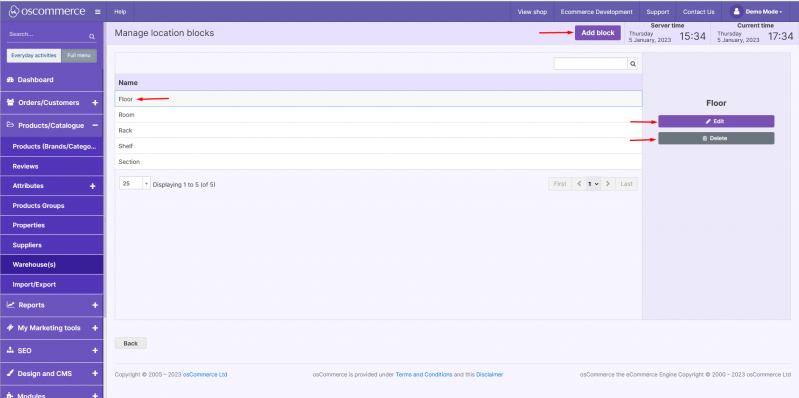
2) Managing Location Blocks
- Click on Manage location blocks.
- You can:
- Add a new location block
- Edit the name of an existing block
- Delete a block by selecting it and clicking the delete option
- Save your changes when finished.
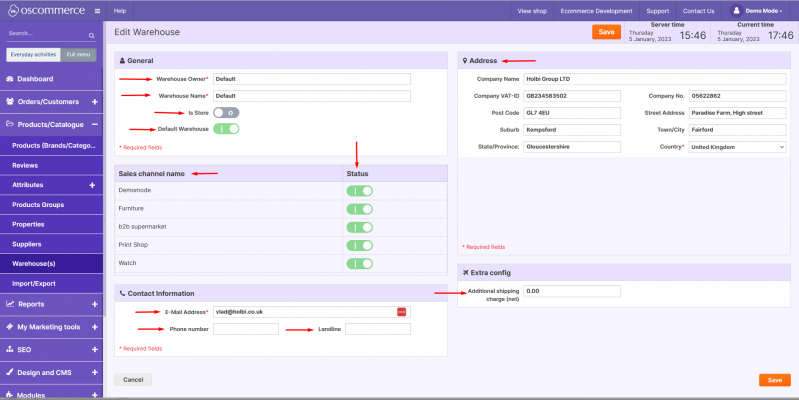
3) Adding or Editing a Warehouse
- Click on Add warehouse to create a new one, or select an existing warehouse and click Edit.
- While adding/editing a warehouse, you can configure:
- Warehouse Owner’s Name
- Warehouse Name
- Is Store (Yes/No)
- Mark as Default Warehouse
- Assign to Sales Channels
- Email Address
- Phone and Landline Number
- Company Information (Company Name, Tax/VAT Number, Company Number, Address)
- Additional Shipping Charge (if applicable)
- Click Save to apply changes.
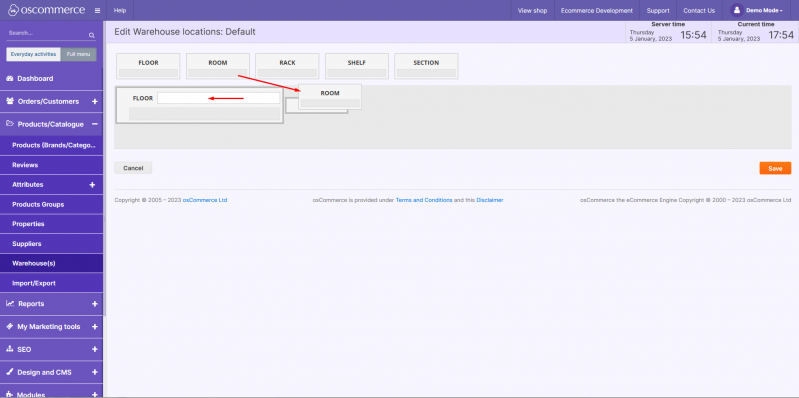
4) Organizing Warehouse Locations
- Click on Warehouse locations.
- You can drag and drop blocks to rearrange their layout.
- Fill in the required location details within each block as needed.