Managing Products
Jump to navigation
Jump to search
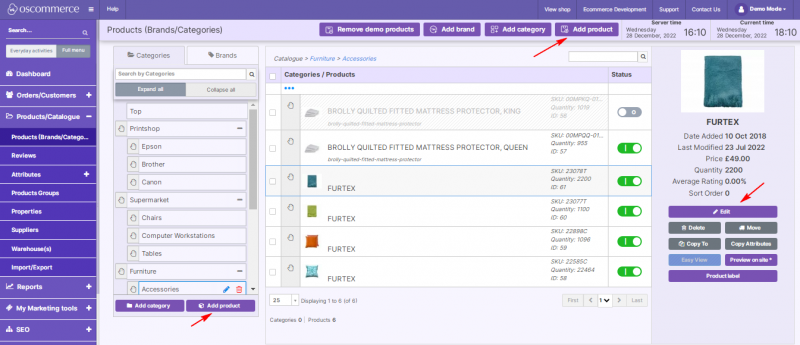
Follow the steps below to search for, manage, and edit products in your store.
1) Access the Products Section
- Log in to the admin area of your website.
- Navigate to Products/Catalogue → Products (Brands/Categories).
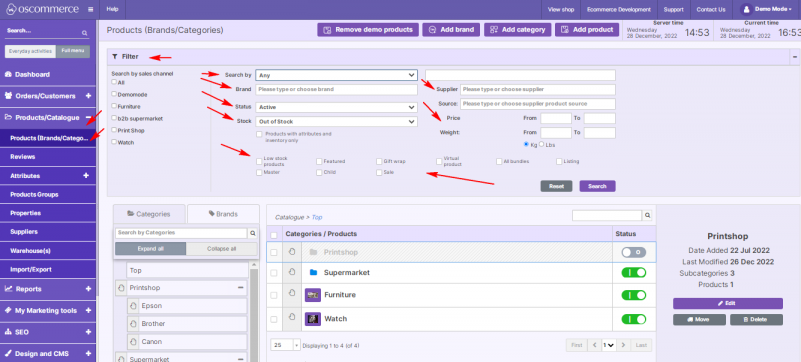
2) Search and Filter Products
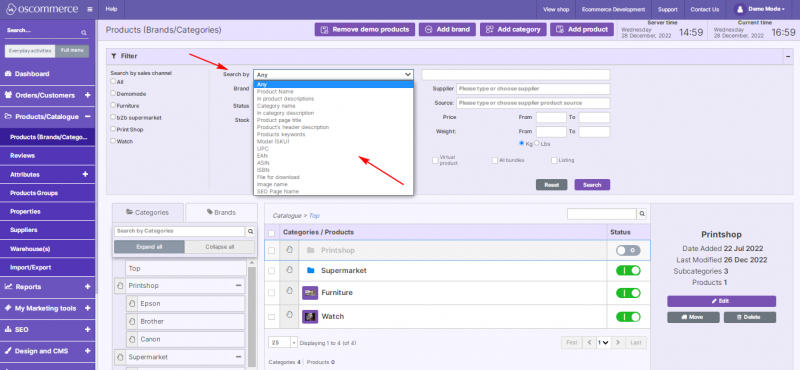
- Use the search field to look for products by:
- Product name, product description, category, category description, product page title, header description, keywords.
- Identifiers such as SKU, EAN, ASIN, ISBN, UPC, product image name, or SEO page name.
- Use Filters to refine results by:
- Sales channel, brand, status, stock availability, low stock flag, featured flag,
- Gift wrap option, virtual products, bundles, sale items, supplier, price, and weight.
3) Manage the Product List
- Use drag and drop to reorder products.
- Use the toggle to switch products on or off (active/inactive).
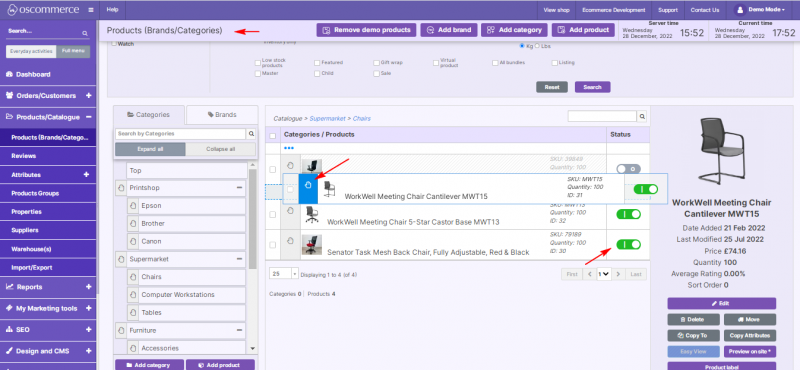
3. Click Add product to create a new product, or Edit to modify an existing one.
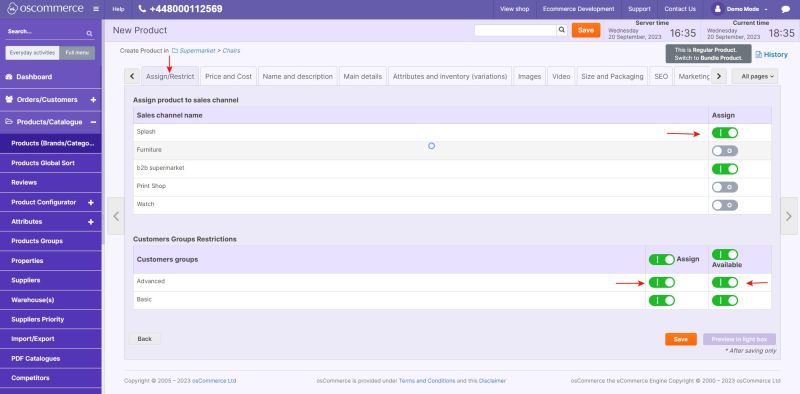
4) Assign Products to Sales Channels and Customer Groups
- Open the product and go to the Assign/Restrict tab.
- Enable sale channels where the product should appear.
- Assign the product to specific customer groups using the Assign switch.
- To make the product unavailable for a group, disable its availability toggle.
See Assigning Products and Categories to Front Ends
5) Configure Price and Cost
- Go to the Price and Cost tab.
- Choose a tax class and define net or gross price.
- (Optional) Base product price on supplier cost and allow auto-updates.
- Set gift wrap and shipping surcharges if needed.
- Configure quantity-based discounts, disable promotions if required, and set RRP.
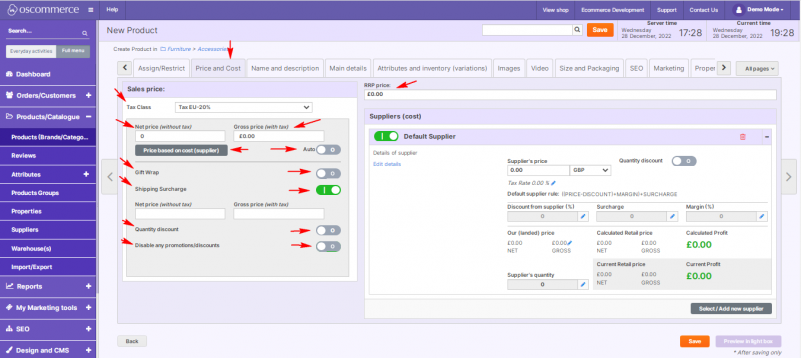
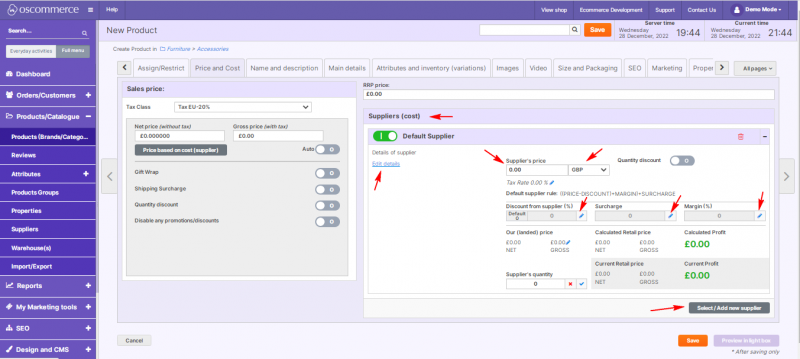
6. Under Suppliers (cost):
- Add/edit supplier, set net cost and currency.
- Configure shop discount, margin, and surcharge.
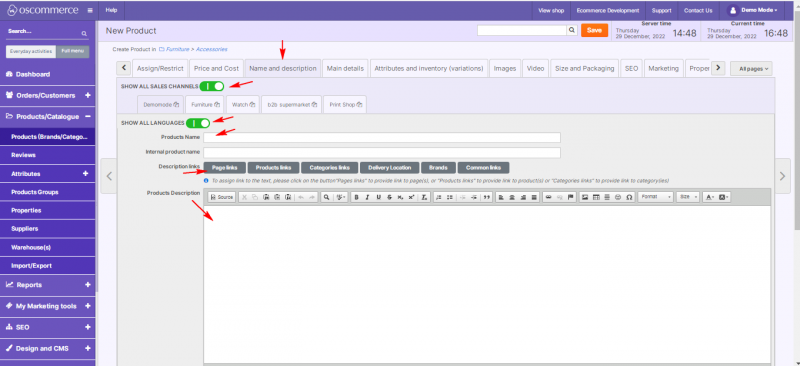
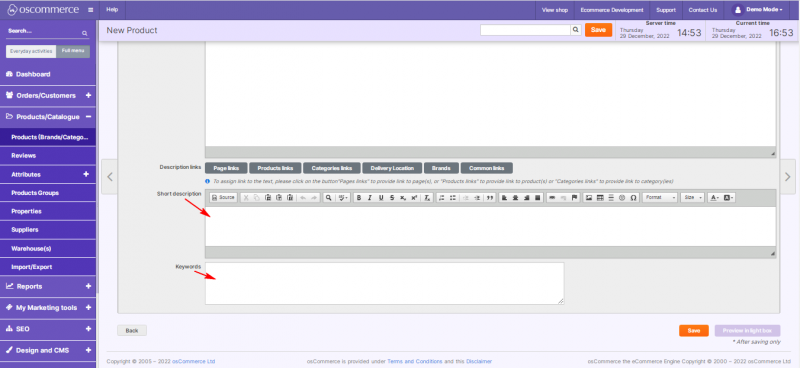
6) Enter Product Name and Description
- Go to the Name and Description tab.
- Enter product name, full description, short description, and keywords.
- Add multilingual content if necessary.
- Enable Show on all sales channels if applicable.
7) Set Main Product Details
- Go to the Main Details tab.
- Set product status (active/inactive) and manual status control if needed.
- Configure:
- Unlimited stock flag.
- Demo product flag.
- Product identifiers (SKU, EAN, ASIN, UPC).
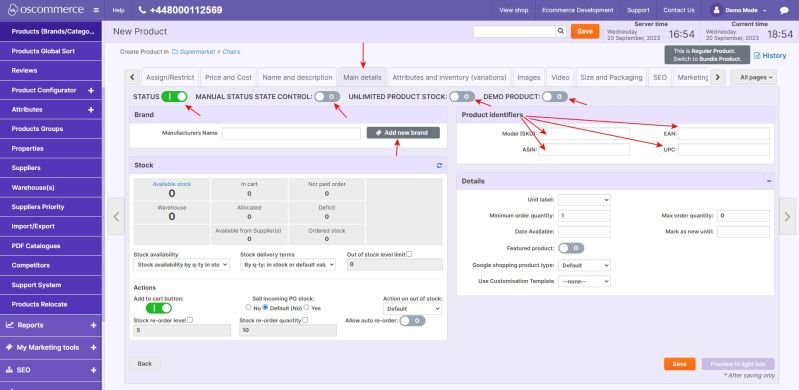
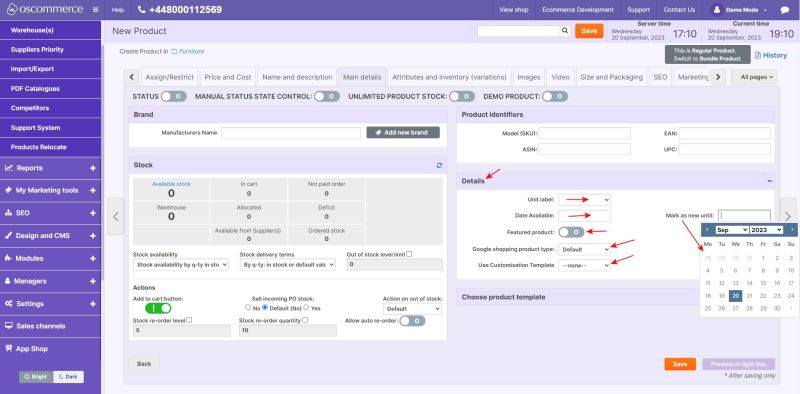
4. Select or create a Brand.
5. Set:
- Unit label,
- Featured status,
- Google Shopping product type,
- Customization template.
6. Set Availability date and New until date.
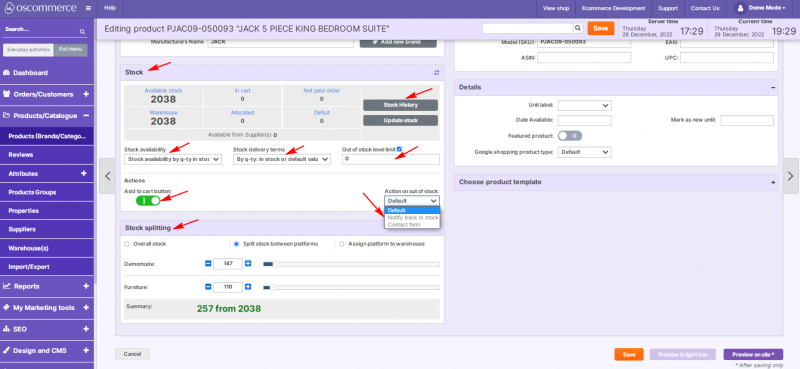
8) Manage Stock and Availability
- Go to the Stock section.
- Choose stock mode: real stock, always in stock, out of stock, hidden, pre-order, etc.
- Enable or disable the Add to cart button.
- Set delivery terms, out-of-stock level, and out-of-stock actions.
- (Optional) Enable Stock splitting.
- For stock history, refer to stock management documentation. See Managing Stock.
9) Assign Attributes and Manage Inventory
- Go to Attributes and Inventory tab.
- Select attribute values and click >> to assign them.
- The attribute value(s) will appear in the Assigned attributes section.
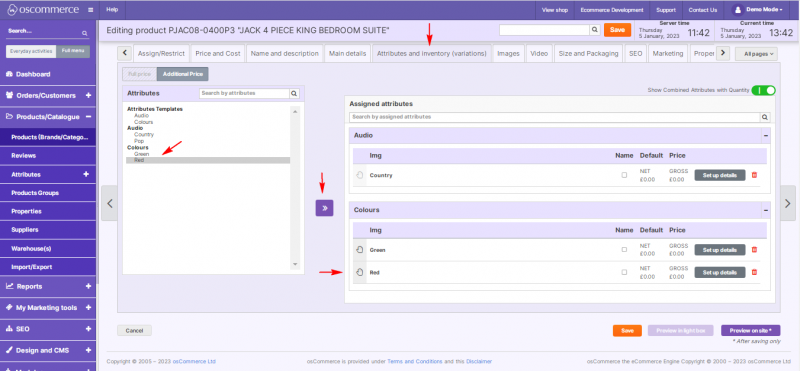
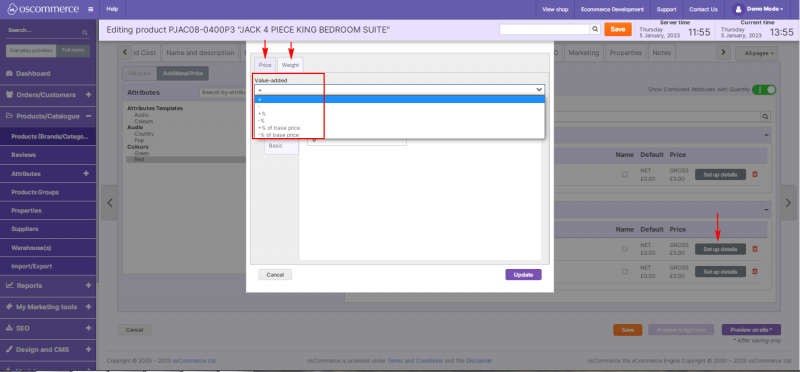
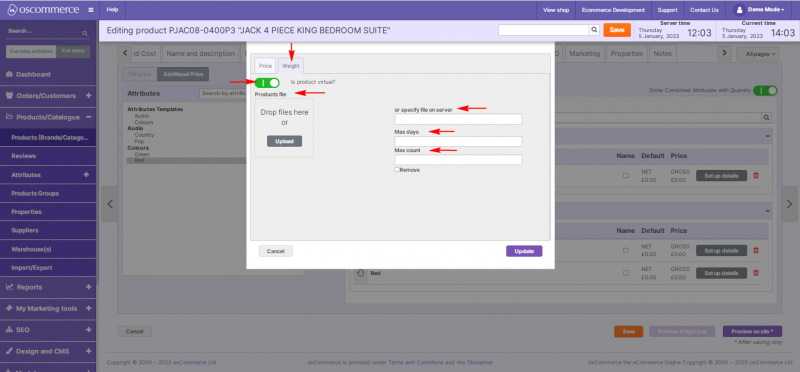
4. Click Set up details to adjust how attributes affect price and weight.
5. For virtual products:
- Upload/downloadable file,
- Set expiry days and download limits.
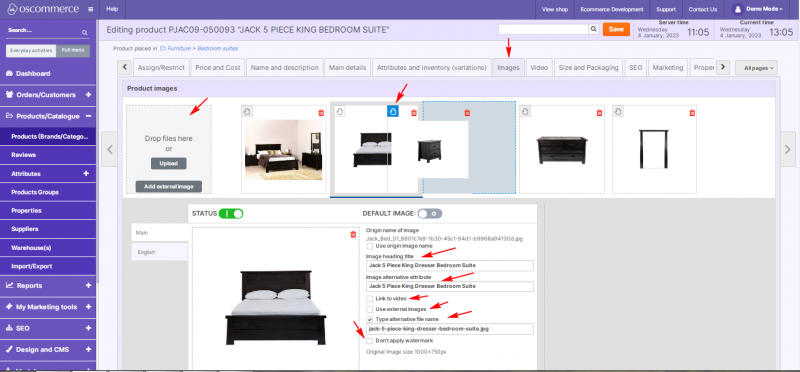
10) Upload and Manage Images
- Open the Images tab.
- Upload single or multiple images.
- Set SEO title, ALT text, and link images to video if needed.
- Optionally:
- Use external image URLs,
- Exclude from watermarking,
- Rearrange images via drag and drop.
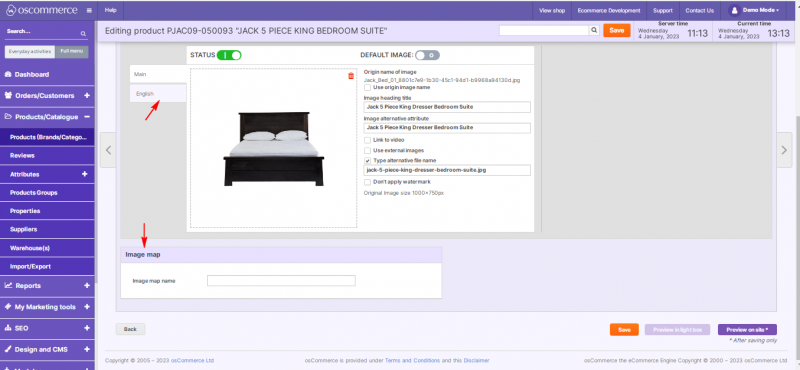
- Upload product image map if any.
- Set image properties in different languages.
11) Add Product Videos
- Go to the Video tab.
- Upload a video or paste a YouTube link.

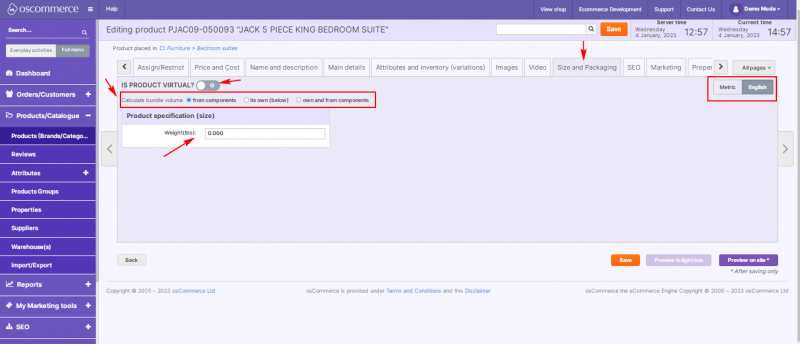
12) Set Size and Packaging
- Open Size and Packaging tab.
- Mark product as virtual if applicable.
- Set weight, and configure volume or use 3 available options to calculate bundle volume.
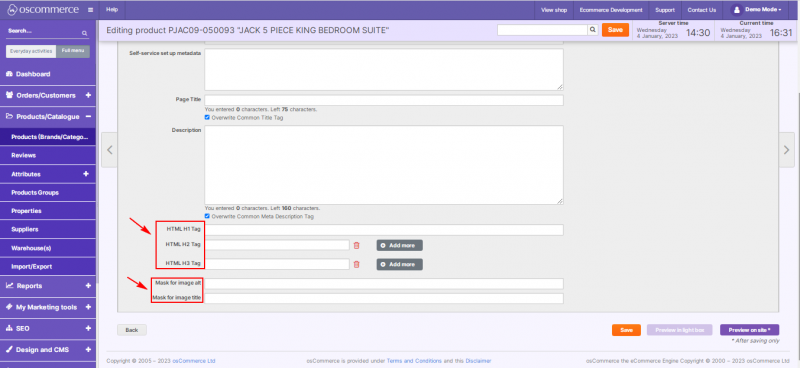
13) Configure SEO Settings
- Go to the SEO tab.
- Set or override:
- SEO page name (URL),
- Noindex/Nofollow flags,
- Canonical URL,
- Page title, description, meta data,
See also Managing SEO
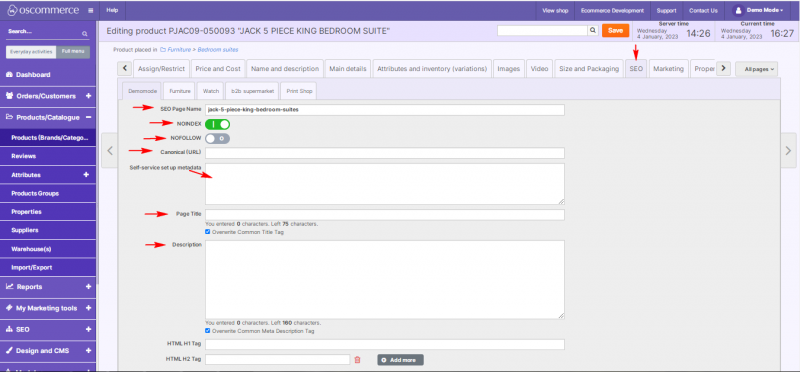
- H1, H2, H3 tags,
- ALT/title templates for images.
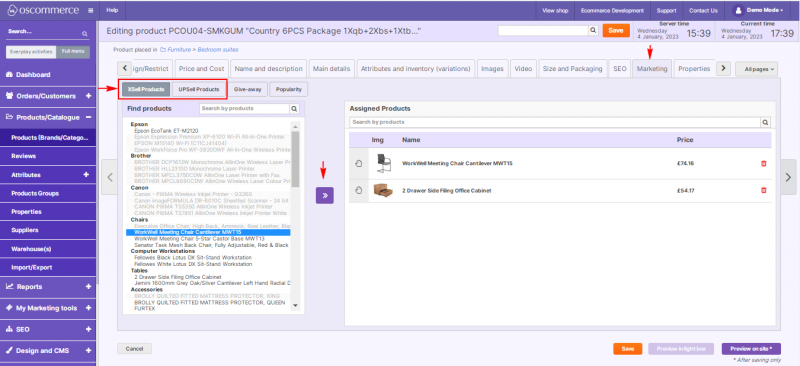
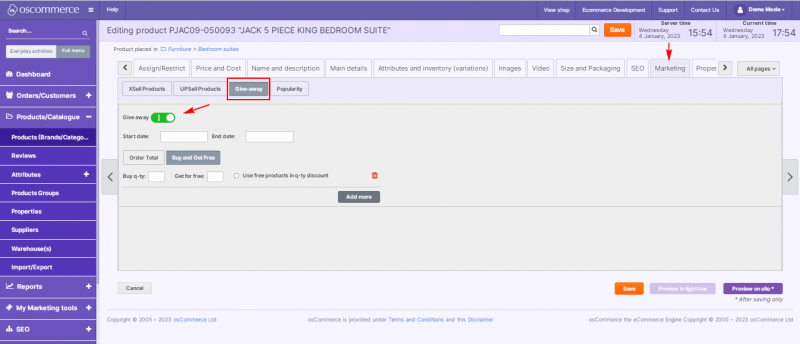
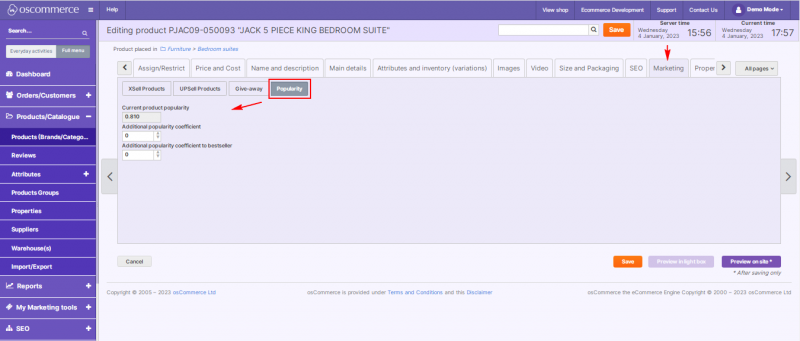
14) Manage Marketing Features
- Go to the Marketing tab.
- Link Upsell and Xsell products.
3. Manage Giveaways.
4. Track product popularity statistics.
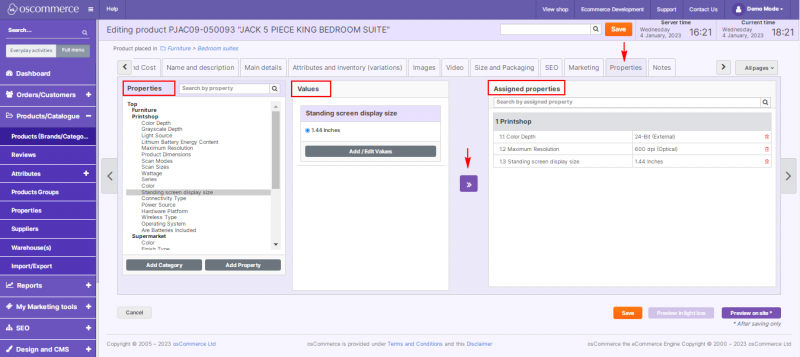
15) Assign Product Properties
- Go to the Properties tab.
- Set technical product properties and values.
See Managing Filters on Categories
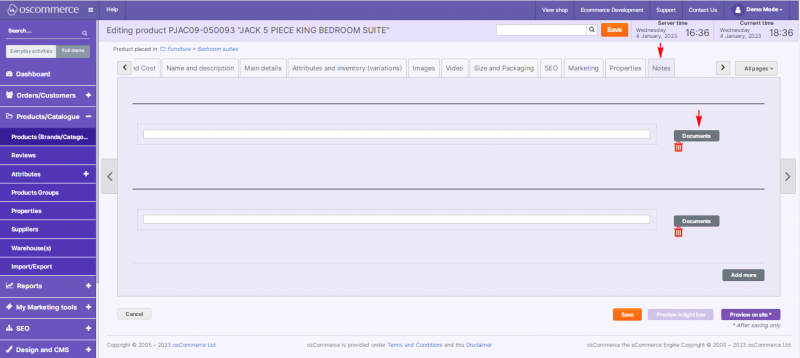
16) Add Internal Notes
- Open the Notes tab.
- Create internal notes for team use.